|
Task |
How to Perform the Task |
|
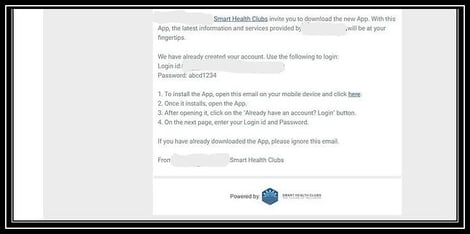
Get started with the Web App |
|
|
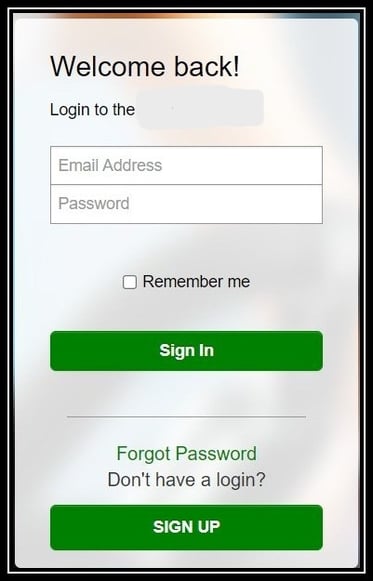
Log in to the Web App |
|
|
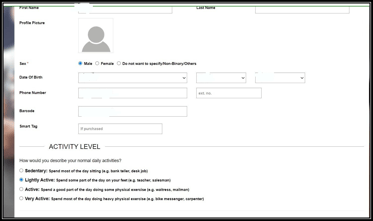
Update Profile |
|
|
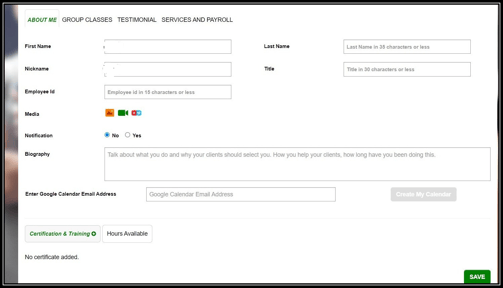
Update About me page ( Certifications, Training hours available, Biography and Testimonials) |
This is the detailed information page about you, which you should use to your advantage and fill it up with as much detail as you can. You can update this information by accessing the Web App. To perform this update, go to Web App > Create > About Me Note: You should build a fantastic About Me section for yourself so you can highlight your services and connect with new clients. Images and Videos are really helpful in building connections, so use them!
|
| Log in to the Club App |
|
|
Create a class (If you are permitted by your management) |
To create a Class, go to Web App > Create > Class To showcase the class on the App, ask your management/director to showcase it Note: Assets such as Classes are based on ownership. These Classes can be owned at two levels- at the level of the individual and at the level of the Club. If you have created a class, you own it and only you can make changes to it. But, your Department director/other instructors will also need access to the class or any other asset you have created and to give them this access, you will need to “Donate” the asset to the Club Library. So while creating the class, check on the Add this class to My Club Library. After creating a class, you can also edit a class by going to Web App > Create > Class and clicking on the pencil icon before the appropriate class To Learn More - Click Here <Class KB Link> |
|
Create Groups |
You can create various interest-based Groups to connect and stay in touch with your members, such as a group for Pilates or a group for the Annual Marathon. To create a Group you need to go to Web App > Create > Groups For more information on creating and editing groups, refer to this link: Note: In order for members to view the group you created on the app, request your Management/Director to showcase the group on the Web App. Please visit the links for further assistance : |
|
Mark attendance for a member |
Mobile App > Club > Department > Calendar > Event • The Mark Attendance button is shown xxx minutes (specified by your department director) before the start of class till 30 minutes after class ends. The Attendance page has a list of all members who have booked the class along with the waitlisted members. • To mark attendance, touch the checkbox after the member name. Instructors can also add a headcount for their class anytime after the class is completed. Web App: Manage > Reports > Attendance Reports • Best Practice – Mark attendance for members who have booked the class x (specified by the director) minutes before class starts. Best practice is 5 minutes. • Best Practice: After this if spots are available, instructors can allow members who are on the wait list or queued outside to take the class. Note: Clubs can extend the ability to mark attendance to their front desk staff as well as all of their staff members. But this varies from club to club and it depends on the Club policies. You can ask your manager to understand your Club’s policies.
|
|
Instructor Substitution (only if your club uses the Instructor Substitution Module from SHC) |
On occasion, when you are unable to take a class, you can request a substitute by- Mobile App > Club page >Selecting the Department > Selecting the Calendar Event> Using the option Need a Substitute Note: Substitution policies are set by management. In case you are unable to find a substitute, kindly contact your management.
|
|
Upload a Video (only if your club uses the On Demand Module from SHC) |
You can upload a video or a series of videos grouped together as episodes under a particular class. You can assign a class name and upload videos under that. This can be done by Web App > Create > Upload On Demand Video
|
|
Take a Live Streaming Class (only if your club uses the Live Streaming Module from SHC) |
You can run live-streaming classes for members like any other class. These are also scheduled as events on the Department Calendar. To start a Live Stream, you need to: 1. Go to the Create > Calendar > Event, and click the "Start Streaming” button. This button is only available when the attendance period starts. By default, this button is set to 30 mins before the start of class and can also be edited on the Web App. 2. Start Streaming from the Camera only after Step 1. 3. The Instructor can also see the Live Stream status and Members who are attending the Live Streamed class. 4. The Live Streaming will automatically stop depending on the time set in the policies For more information on Live Streaming, refer the following link: Note: Live Stream Events can only be added by your Department director on the department calendar. |
|
Fitness Plans |
1. Test adding a client to your dashboard by Going to Create > Dashboard > Search for a client's name > Add member as your client > Click on yes. 2. Test assigning a Fitness Plan to the client, Click on "Add A Plan" Button > Fitness plans > Click on the + Button > Select a plan > Select the start date and end date > Click on Assign 3. Test creating a Fitness Plan by going to Create > Fitness Plans > Click on the plus icon > Fill in the required details > Click on add workout > Click on E-commerce to monetize the plan > Click on save. < Fitness Plans Link> |
|
Reports |
After Completing the above tasks, test the reports by going to Manage > Reports V2 and examining the data. |