
Click to Jump to a specific topic :
A. Features of the SHC Live Streaming Module
B. Live Streaming Policies (Applied to all Live Streams)
C. Process to set up a Live Stream Class (One time set up)
D. How will your Instructors start Live Streaming?
E. How will your members experience Live Streaming?
F. How will members experience Live Streaming on a Web Platform?
A. Features of the SHC Live Streaming Module
- All your video content is precious and that is why we have protected it with a Paywall
- High-quality video streaming using various camera types
- Differential pricing for your members based on the membership type
- Single-button operation, no need to share URLs with your members
- Live Streamed videos may be recorded and automatically converted to On-Demand videos
- Automatic attendance recording
B. Live Streaming Policies (Applied to all Live Streams)
If you want to set up Live Streaming for your club, there are certain one-time decisions you need to take and execute at the Company level for all your Live Streaming activities. These decisions are set at the Company level, which means they are applicable to all your locations even if you have 20 locations!
We call these one time decisions, policies, and these decisions are listed below:
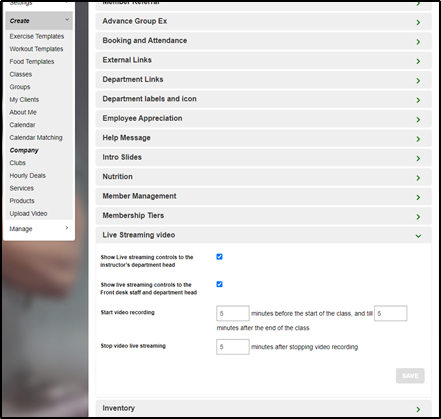
- Who should be able to start a live stream class?
- The Instructor, OR/AND
- The Department Heads, OR/AND
- Both the Department Heads and Front Desk - When should video recording start before the class and when should it stop after the class?
- When should Live Video Streaming be stopped after Video Recording has been stopped?
Screenshot 1.1
C. Process to set up a Live Stream Class (One time set up)
Setting up a Live Stream class involves 3 simple steps:
- Set up a Live Stream Camera
- Create a Live Stream Class
- Schedule a Live Stream Class
1. Setting Up a Live Streaming Camera
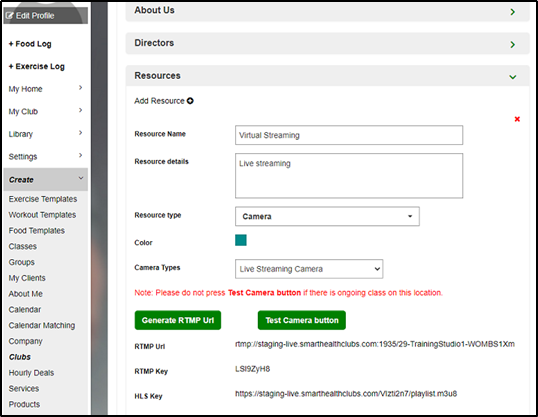
To set up a Webcam, Phone Camera, Live Streaming camera (Mevo, GoPro) and IP Camera go to Create>Club>Resources page (Screenshot 2.1)
-
- Select a Resource type as Camera
- Select the type of Camera that you want to use
- Generate an RTMP URL and input it (and potentially RTMP Key) in your camera
-
-
Test Camera1. Go to Create > Clubs > Resources.2. Click on the "Test Camera" button.3. Go to your camera and start Live Streaming.4. Click the Refresh button on the Test Camera pop-up. This would take 30-40 secs to see the streaming output here.
-
Screenshot 2.1
2. Create a Live Stream Class
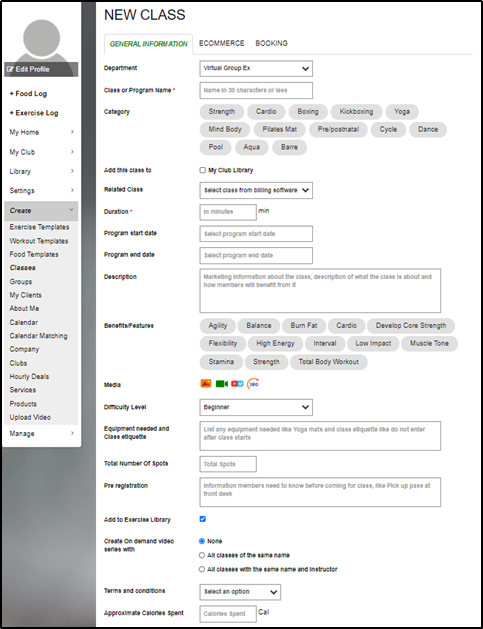
To create a live streaming class or series, go to Create>Classes page (Screenshot 3.1)
-
- Select the Virtual Department that is enabled for Live Streaming.
- Select option for the automatic creation of the On-Demand video series.
- On-Demand video series can be created with all classes of the same name or all classes with the same name and instructor.
- From the ECommerce tab, decide how you want to price the Live Streaming class
- The pricing may be done based on Membership Tiers OR
- The pricing may be based on a service purchased by the Member - Put booking limitations, if desired
Screenshot 3.1
3. Schedule Live Streaming Classes
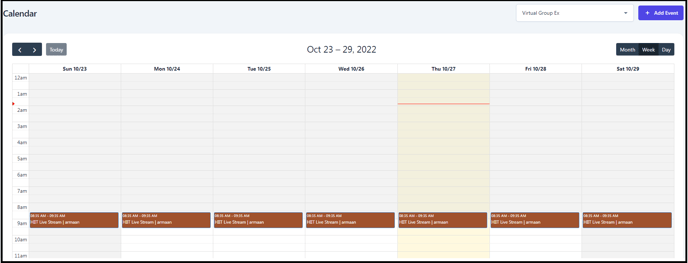
To schedule a Live Streaming class, go to Create>Calendar page. (Screenshot 4.1)
-
- Select the Department used for Live Streaming.
- Click on the Add Event button.
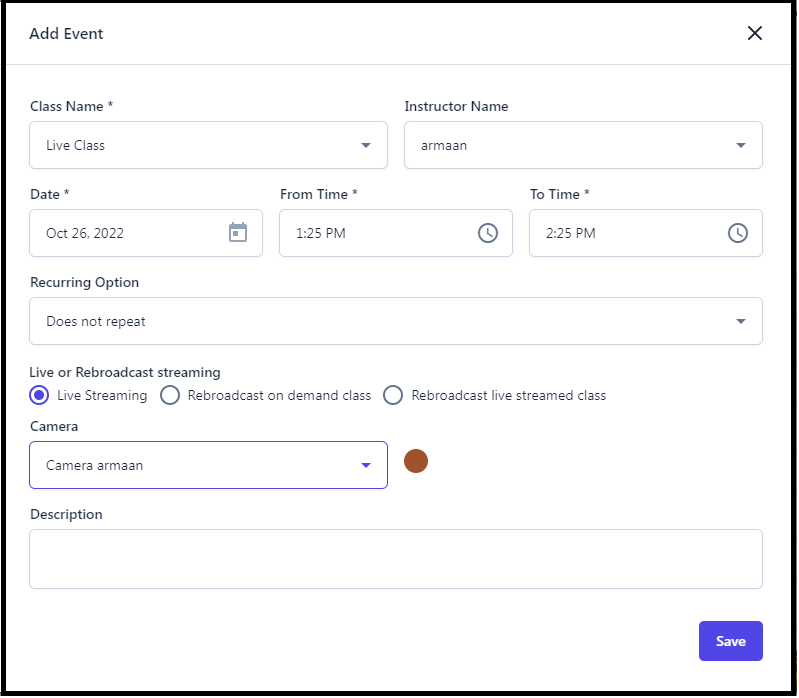
- Select the appropriate Live Streaming class on the Add Event pop-up. (Screenshot 4.2)
- Select the Instructor teaching the Live Streaming class.
- Pick the Date and Time for the Live streaming class and the re-occurrence options.
- Select the Camera used for the Live Streaming event.
Screenshot 4.1
Screenshot 4.2
D. How will your Instructors start Live Streaming?
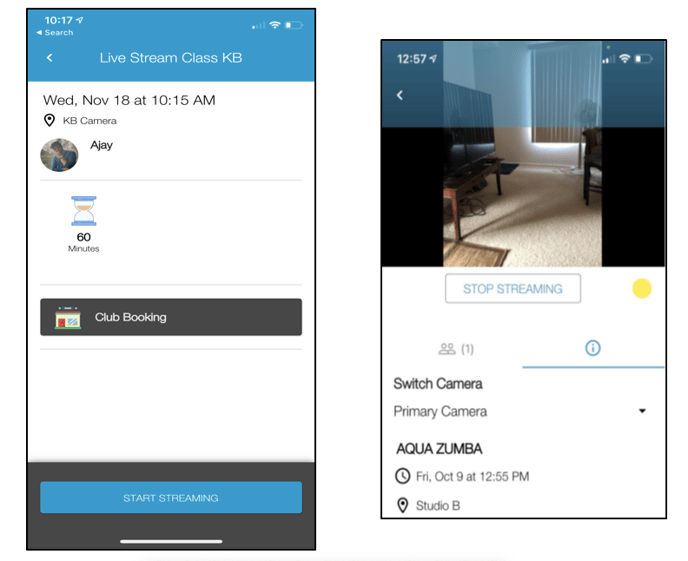
The Instructor can start Live Streaming either from the connected Camera or from the Phone App by going to the Live Streaming event on the Calendar page.
To start a Live Stream, Instructors need to:
OR
Click on the Stop Streaming Button. (Screenshot 5.1)
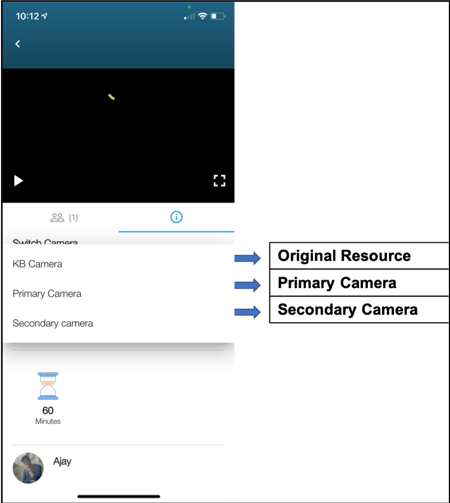
Note:- In the case of a Live Stream or Camera Failure, an instructor can simply switch to their Phone Camera in order to continue streaming the class. (Screenshot 5.3)
Screenshot 5.1
Screenshot 5.2
Screenshot 5.3
E. How will your members experience Live Streaming?
Live Streams are very well protected by a paywall so only your registered/authorized members can view the class.
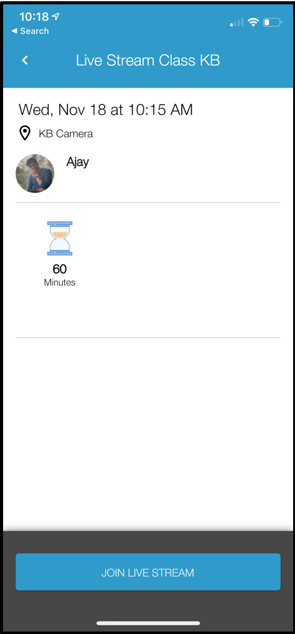
To view the Live Stream, members need to just follow 2 simple steps:
1. Go to the calendar event on the App.
2. Click a single button, Join Live Stream to watch the Live Stream on their Phone, or Smart TV. Members will see the streaming after a delay of 40 seconds.
3. Members can also chat with the Instructor and other members in the class.
4. If an instructor has not started the Live Stream when a member has joined, they will see a screen with the message, "Please wait for <Instructor Name> to start Live Stream".
F. How will members experience Live Streaming on a Web Platform?
- Live Streamed videos can also be viewed by members and clubs on the Web App.
- Live Streamed video on the web can be implemented by clubs in 2 ways. They are :
- Clubs can allow their members to login to the WebApp with the same credentials as their app. Members can then go Web App > My Club > Virtual Department > Calendar and view the information in a web format.
- Clubs can use the link of the page from the Web App and provide that link on their website or use any other method to communicate the link to their members. This way, members will get direct access to all Live Streamed Videos with a single click.
- To obtain this link, clubs can go to Web App > My Club > Virtual Department > Live Streaming Calendar and copy the link on the browser.
For Troubleshooting tips related to Live Streaming - Click Here